
I bought the JMGO IRIS Ultra Max because I wanted a projector that could produce a genuinely large, sharp picture without turning the setup into a complicated home theater project. On paper, it is a serious piece of hardware, with a 4K triple-laser light source, up to 6,500 ISO lumens, and support for 4K gaming at 120Hz. Those specifications certainly caught my attention, but after using it myself, what stands out most is not a number on the specification sheet. It is how much image you can get on the wall with surprisingly little effort.
I have been using the projector for movies, general viewing and gaming, and overall I have been very happy with it. It is not perfect, and I think there are a few things JMGO could have done better, particularly when it comes to explaining the picture settings. However, the actual image quality is impressive, especially once I spent some time adjusting the projector to suit my room and the type of content I was watching.
My Experience Using The JMGO IRIS Ultra Max
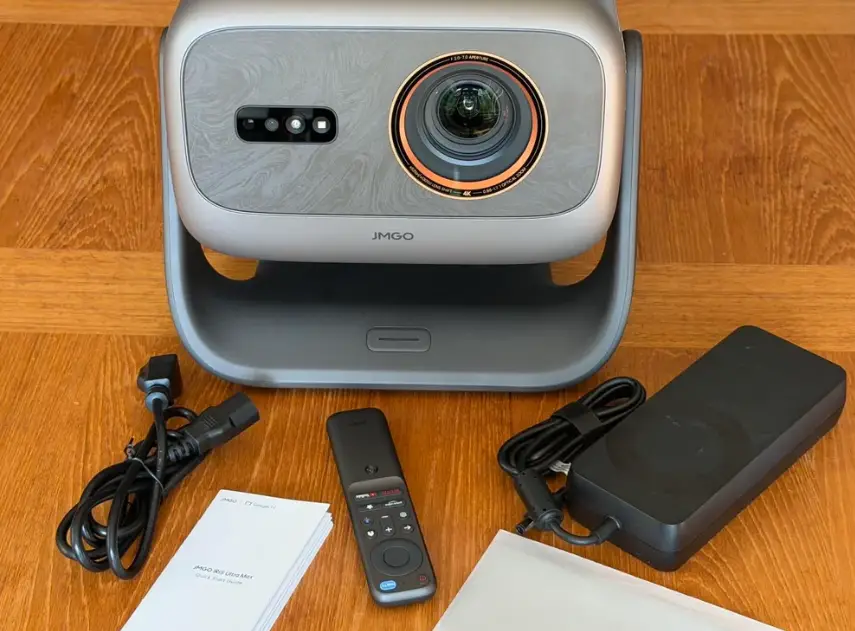
The first thing I noticed was the brightness. The JMGO IRIS Ultra Max is extremely bright, and I actually found that the default brightness could be more than I wanted for certain types of content. Snow scenes, bright daytime interiors and other high-key images could become a little uncomfortable during a longer movie session. I ended up lowering the brightness by a few steps, and that made a noticeable difference to viewing comfort without taking away the impact of bright highlights.
That may sound like a strange complaint for a projector that is marketed around its high brightness, but I would rather have too much brightness available than not enough. For nighttime movie watching, I certainly do not need the projector running at its maximum capability. Having that extra headroom is useful, though, particularly if you are dealing with a larger screen or a room that is not completely dark.
The image itself is also very sharp. Small objects remain easy to pick out in brighter scenes, and I did not feel the need to push the sharpness control very high to get a clean-looking picture. That is something I appreciate because excessive sharpening can make an image look artificial, especially around text, buildings and other fine details. With the IRIS Ultra Max, I was able to keep the image looking detailed without having to constantly fight the settings.
How Does the JMGO IRIS Ultra Max Look in Dark Scenes?
Dark scenes were another area where I spent quite a bit of time experimenting. When a scene contains only a few light sources, the bright parts immediately grab your attention, but I was also able to see quite a lot of detail in the darker areas around them. Walls, buildings and other objects did not simply disappear into one large dark patch. When the picture moved from a bright area into shadow, there was still visible shading and surface detail, which made the image feel much more natural.
The projector does not suddenly turn into an OLED television just because it is a high-end laser projector. The black level is still limited by the nature of projection, and anyone expecting completely black backgrounds should keep that in mind. However, the iris settings made a bigger difference than I expected.
After trying the different iris options, I personally prefer using the smaller aperture for movies. Closing the iris reduces some of the gray appearance that can show up in darker backgrounds and makes the blacks look deeper. The overall picture becomes slightly less bright, but for movie watching I am happy to make that trade. I would rather have a little less brightness with a more convincing dark scene than have everything pushed as bright as possible.
The Picture Settings Takes Some Getting Used To
This is probably my biggest criticism of the JMGO IRIS Ultra Max. There are plenty of picture controls, but understanding how they all interact is not always straightforward. I found myself experimenting with settings such as Low Latency, ALLM, VRR and the different gaming presets before I had a good idea of what worked best for different types of content.
For someone who enjoys adjusting picture settings, this is not necessarily a major problem. I actually like having control over the image, and I would rather have useful options than have everything locked down. The problem is that the projector does not do enough to explain those options in a simple way.
I think JMGO could improve the experience considerably by providing a straightforward setup guide for SDR movies, HDR content and gaming. Something as simple as explaining which settings are intended for movies, which ones are useful for consoles and when to use Low Latency, ALLM or VRR would make the initial setup much easier. I am still adjusting my movie and gaming presets because I have found that the settings that look good for one type of content are not necessarily the ones I want to use for another.
Setting Up a 100-Inch Plus Image Was Easier Than I Expected
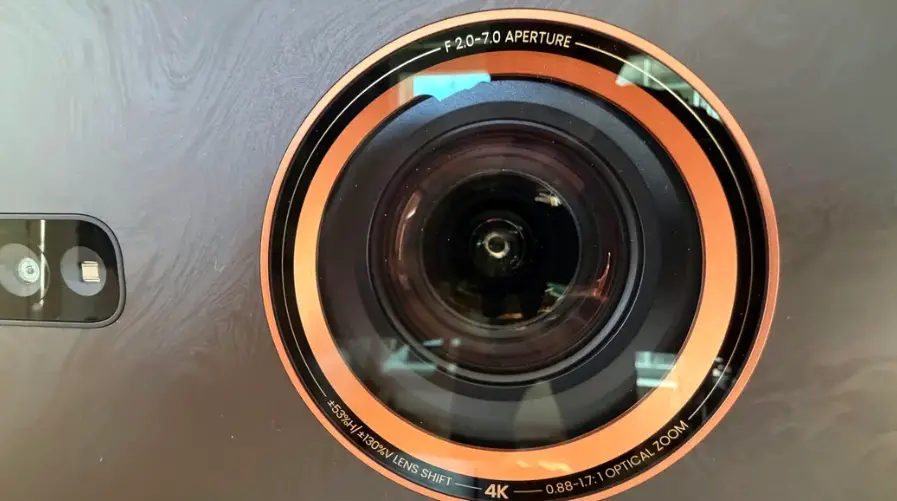
One of the things I genuinely enjoyed about using the JMGO IRIS Ultra Max was getting a huge image onto the wall without spending hours trying to make everything line up perfectly. The autofocus and wall color calibration did a lot of the work for me, while the optical adjustment options gave me more flexibility when positioning the projector.
I was particularly surprised by how little rearranging was required to get a large image looking good. I was able to produce an image over 100 inches without turning the room into a permanent home theater installation. That is a big part of the appeal for me because I wanted the big-screen experience without having to mount everything permanently or redesign the room around a projector.
The picture remained sharp at that size, too. Obviously, the quality of the wall or screen and the viewing environment will affect the final result, but I was impressed by how well the image held together once it was enlarged. For movie nights, having that much screen real estate makes a noticeable difference.

JMGO IRIS Ultra Max for Gaming
The gaming specifications are another major part of the appeal here. The projector supports 4K at 120Hz, along with features such as VRR and ALLM, so there is plenty here for someone who wants a large gaming display rather than using it only for movies.
My main issue was not the hardware but figuring out which settings I actually wanted to use. The gaming-related options can take some trial and error, particularly if you are switching between different consoles, games or picture modes. Once you understand what each setting is doing, it becomes easier, but the learning curve could have been smaller.
I would recommend spending some time setting up a dedicated gaming preset rather than constantly changing the movie settings. I am still refining mine, but having separate settings for different uses makes much more sense than trying to find one configuration that works perfectly for everything.
The Projector Is Big, and You Should Know That Before Buying
The size of the JMGO IRIS Ultra Max is something I would not overlook. This is a fairly large and heavy projector, so it is not something I would want to carry from the living room to the bedroom and back every evening. Once I found a suitable position, I was much happier leaving it there.
That is not really a problem for my setup because I bought it for a large-screen viewing experience rather than portability. Still, if you are looking for a projector that you can easily pick up and move around the house, this is probably not the type of design you have in mind.
For a more permanent setup, though, the size makes more sense. Find the right position, make the adjustments, save your preferred settings and leave it alone. The autofocus and other setup features mean you do not have to spend ages manually correcting the image every time you use it.
A Note About My Photos
If you see photos of the projector’s image in this review, keep in mind that they were taken with a phone. Phone cameras automatically adjust exposure and white balance, so the photographs cannot accurately reproduce the brightness, HDR highlights, colors or black levels that I see in person.
I would use the photos as a general reference for the size and type of image I was getting rather than treating them as an exact representation of the projector’s performance. In person, the image looks different depending on the content, room lighting and picture settings.
JMGO IRIS Ultra Max Pros and Cons
Pros
- Extremely bright 4K triple-laser picture
- Sharp and detailed image at 100 inches and beyond
- Autofocus makes the initial setup much easier
- Wall color calibration is useful for a quick setup
- Plenty of optical adjustment for different placements
- 4K 120Hz gaming support
- VRR and ALLM support
- Smaller iris setting can improve the appearance of darker movie scenes
- More than enough brightness for nighttime viewing
Cons
- Picture settings can be confusing at first
- Gaming modes require some trial and error
- JMGO could provide better guidance for SDR, HDR and gaming setup
- Large and heavy, so it is not ideal for moving between rooms
- Black levels are still limited compared with an OLED display
Is the JMGO IRIS Ultra Max Worth Buying?
After using the JMGO IRIS Ultra Max myself, I think its strongest point is the combination of image size, sharpness and brightness. I was able to get a very large picture on the wall without a complicated permanent installation, and the image remained detailed enough that the size actually felt worthwhile rather than simply being a giant but soft projection.
I also like that I can reduce the brightness and adjust the iris instead of having to accept the factory settings. For my movie watching, using a smaller aperture and giving up some brightness produces a picture that I find more comfortable and more convincing in darker scenes. The projector has enough brightness to spare that lowering it does not make the image feel weak.
The biggest thing I would change is the setup guidance. There are enough controls here that a new owner can easily spend time wondering which combination is actually appropriate for movies, HDR and gaming. A clear JMGO IRIS Ultra Max setup guide with recommended starting points for each type of content would make the experience much less frustrating.
Conclusion
I bought the JMGO IRIS Ultra Max expecting a high-end projector, and after using it, the image quality is the part that has impressed me most. The brightness is almost excessive for a dark room, but that is much easier to deal with than a projector that does not have enough light when you need it. Once I reduced the brightness and experimented with the iris, I found a setup that works very well for movies, while the 4K 120Hz support and gaming features give it plenty of potential beyond watching films.
It is not the easiest projector to understand straight out of the box, and I would have appreciated better guidance for the picture and gaming menus. It is also too large and heavy for me to want to move around regularly. Those are the main compromises I have noticed.
For me, though, the actual viewing experience makes those issues easier to accept. Getting a sharp 100-inch-plus picture with autofocus, wall calibration and relatively little manual setup is genuinely impressive. If you are looking specifically for a high-end 4K laser projector for a more permanent home cinema or gaming setup, the JMGO IRIS Ultra Max has delivered a very good experience in my own use.
Check out Mansculpt wave therapy plus that I talked about earlier.